So here is a photographic guide to knitting your own bracelet in the comfort of your own home:
Firstly thread all your beads onto the wire.
 |
| These beads have been emptied onto a bead mat to stop them from rolling around, you could also choose to pour the beads onto a bowl if you prefer or a bead spinning bowl. |
 |
| This is my preferred way of threading just push the wire through the beads scooping up as you go, |
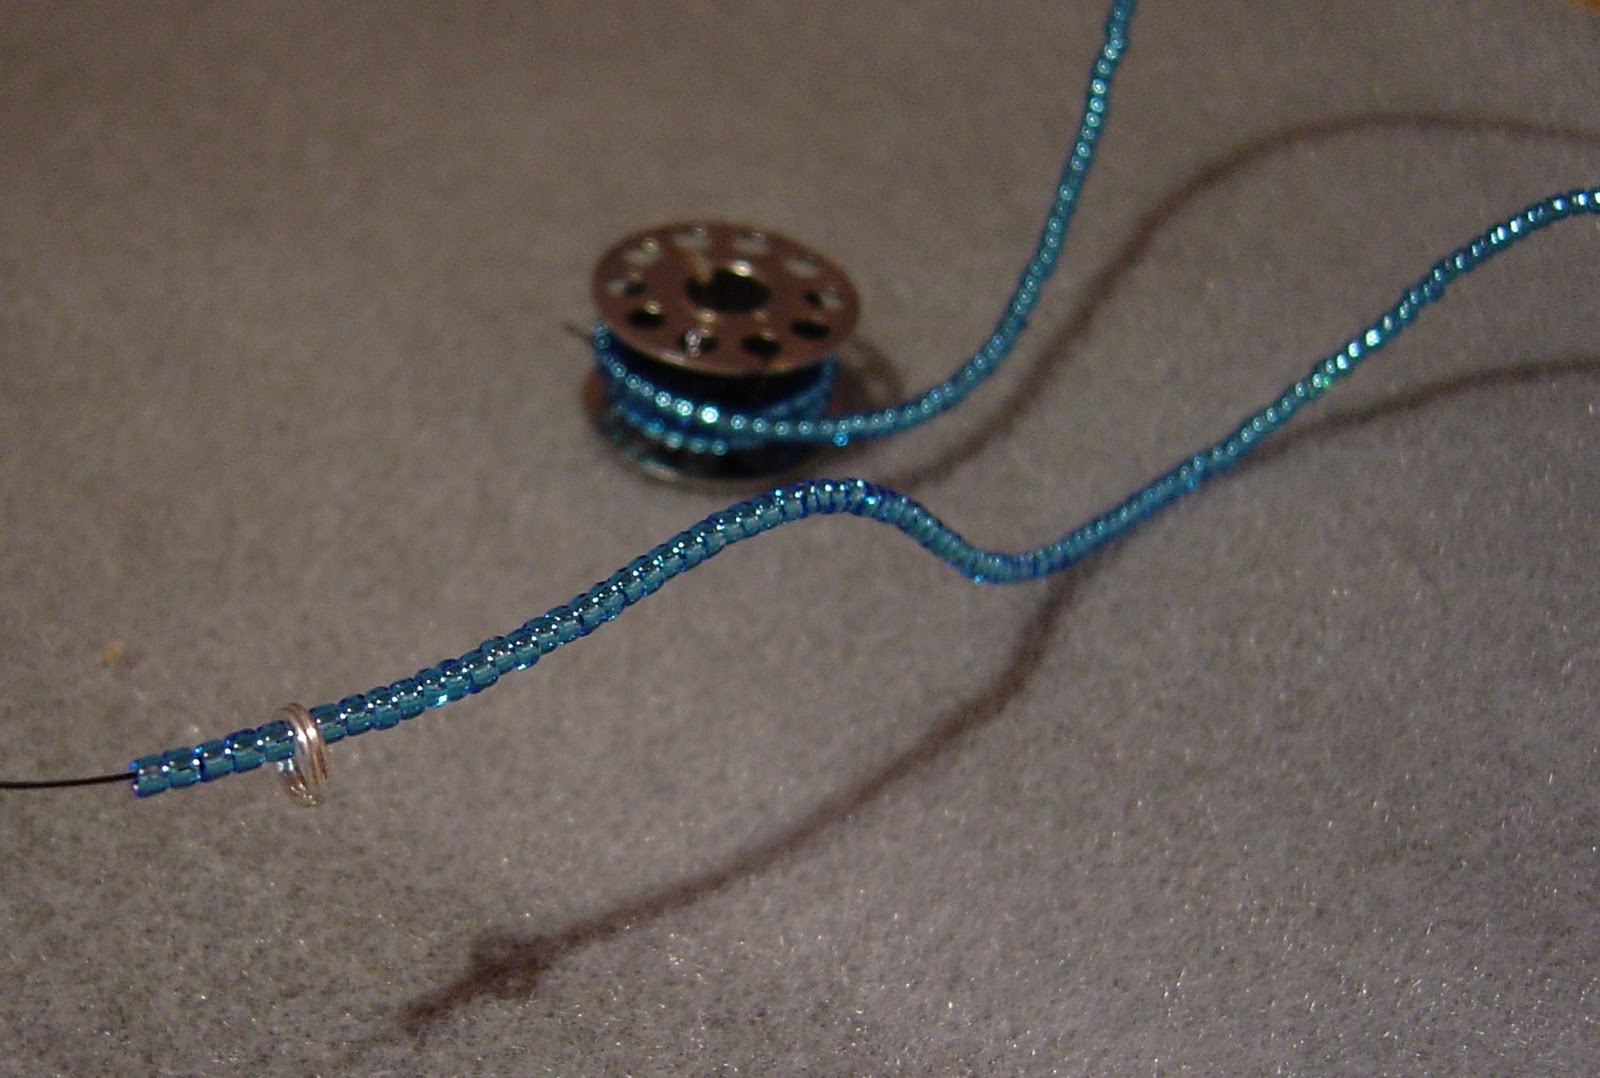 |
| The ring will slide over the beads don't worry, just try and keep it near the end of the wire |
using 3mm needles join wire for casting on leaving 2 inches of wire free.
cast on 3 stitches then include the split ring into the 4th cast on stitch -

continue until 7 stitches have been cast on.

knit every row include one bead with each stitch.


cut remaining wire leaving a length of 12 inches attached to the bracelet - discard the remaining beads on wire as they won't be needed and thread on the clasp
cast off 3 stitches include the clasp in the 4th stitch cast off then continue casting off to the end.

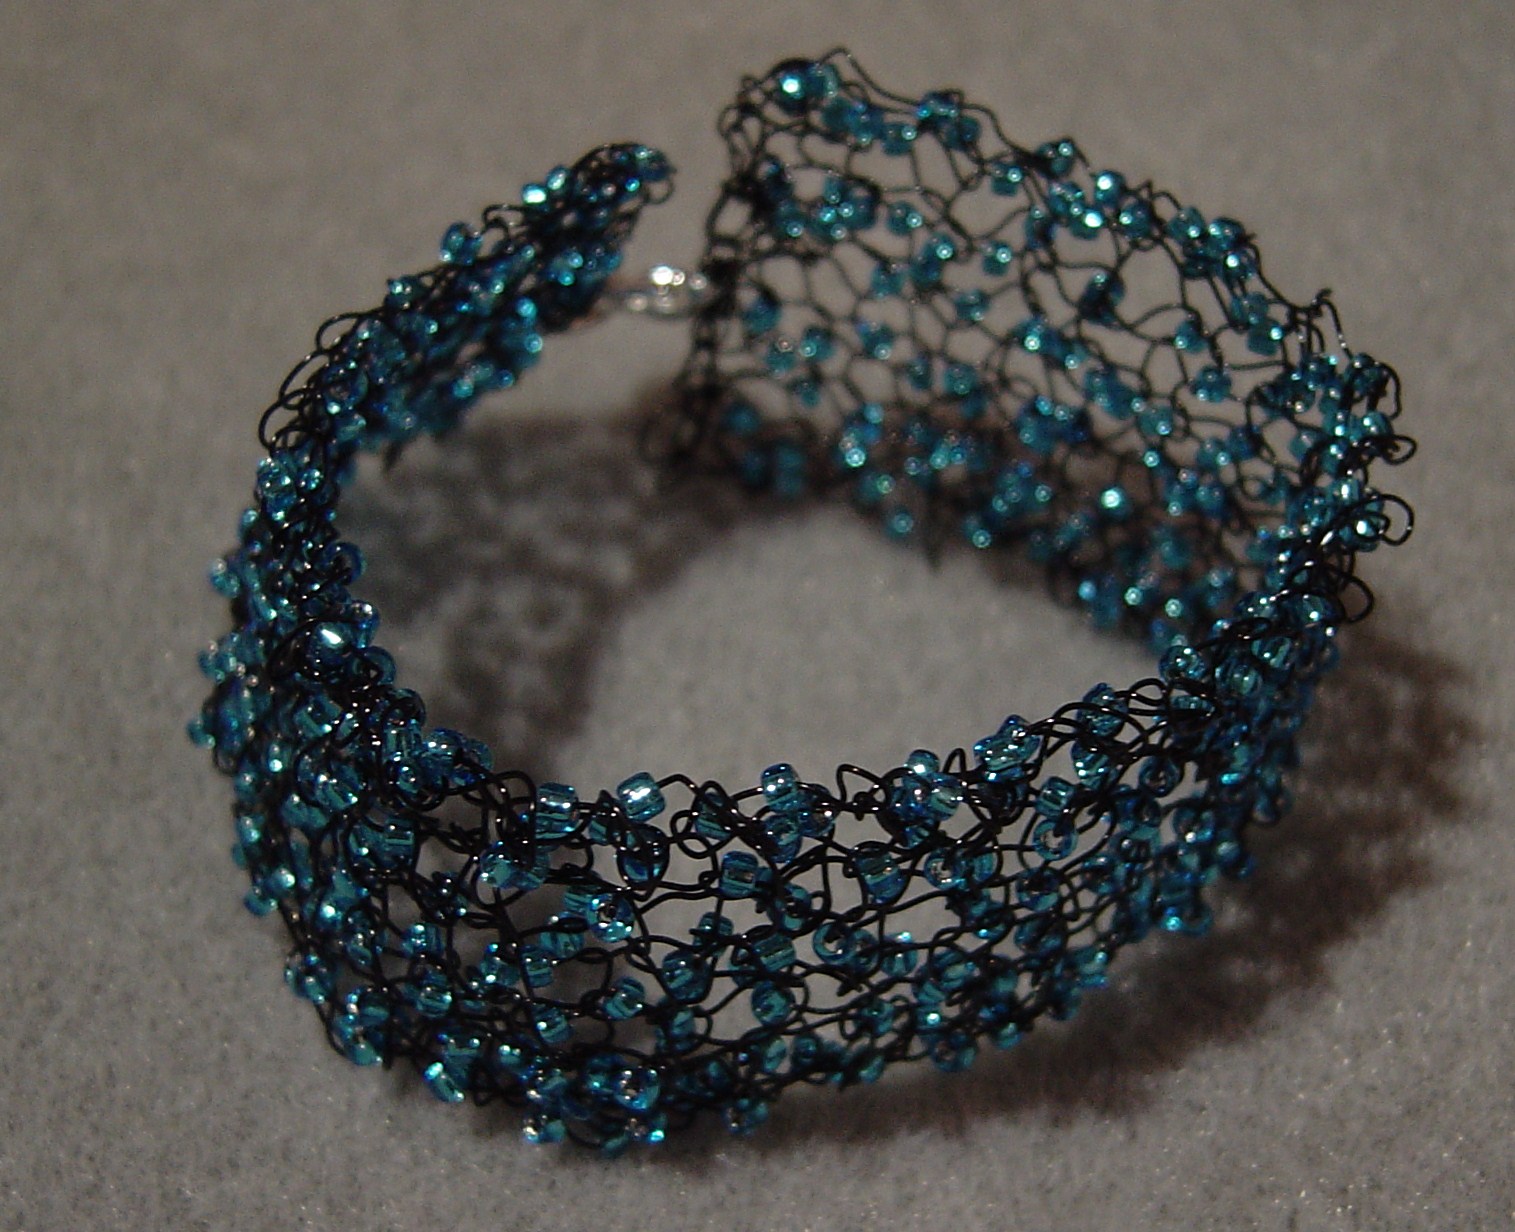

Kits for this bracelet are available, knitting needles not included - please contact me!
What a great tip adding the split ring. I have knitted bracelets before but then added magnetic clasps. This is much easier.
ReplyDelete